Tuesday, June 12, 2018

A Simple Makefile Tutorial

Makefiles are a simple way to organize code compilation. This tutorial does not even scratch the surface of what is possible using make, but is intended as a starters guide so that you can quickly and easily create your own makefiles for small to medium-sized projects.

A Simple Example

Let's start off with the following three files, hellomake.c, hellofunc.c, and hellomake.h, which would represent a typical main program, some functional code in a separate file, and an include file, respectively.
hellomake.chellofunc.chellomake.h
#include <hellomake.h>

int main() {
  // call a function in another file
  myPrintHelloMake();

  return(0);
}
#include <stdio.h>
#include <hellomake.h>

void myPrintHelloMake(void) {

  printf("Hello makefiles!\n");

  return;
}
/*
example include file
*/

void myPrintHelloMake(void);
Normally, you would compile this collection of code by executing the following command:
gcc -o hellomake hellomake.c hellofunc.c -I.
This compiles the two .c files and names the executable hellomake. The -I. is included so that gcc will look in the current directory (.) for the include file hellomake.h. Without a makefile, the typical approach to the test/modify/debug cycle is to use the up arrow in a terminal to go back to your last compile command so you don't have to type it each time, especially once you've added a few more .c files to the mix.
Unfortunately, this approach to compilation has two downfalls. First, if you lose the compile command or switch computers you have to retype it from scratch, which is inefficient at best. Second, if you are only making changes to one .c file, recompiling all of them every time is also time-consuming and inefficient. So, it's time to see what we can do with a makefile.
The simplest makefile you could create would look something like:
Makefile 1
hellomake: hellomake.c hellofunc.c
     gcc -o hellomake hellomake.c hellofunc.c -I.
If you put this rule into a file called Makefile or makefile and then type make on the command line it will execute the compile command as you have written it in the makefile. Note that make with no arguments executes the first rule in the file. Furthermore, by putting the list of files on which the command depends on the first line after the :, make knows that the rule hellomake needs to be executed if any of those files change. Immediately, you have solved problem #1 and can avoid using the up arrow repeatedly, looking for your last compile command. However, the system is still not being efficient in terms of compiling only the latest changes.
One very important thing to note is that there is a tab before the gcc command in the makefile. There must be a tab at the beginning of any command, and make will not be happy if it's not there.
In order to be a bit more efficient, let's try the following:
Makefile 2
CC=gcc
CFLAGS=-I.

hellomake: hellomake.o hellofunc.o
     $(CC) -o hellomake hellomake.o hellofunc.o

So now we've defined some constants CC and CFLAGS. It turns out these are special constants that communicate to make how we want to compile the files hellomake.c and hellofunc.c. In particular, the macro CC is the C compiler to use, and CFLAGS is the list of flags to pass to the compilation command. By putting the object files--hellomake.o and hellofunc.o--in the dependency list and in the rule, make knows it must first compile the .c versions individually, and then build the executable hellomake.
Using this form of makefile is sufficient for most small scale projects. However, there is one thing missing: dependency on the include files. If you were to make a change to hellomake.h, for example, make would not recompile the .c files, even though they needed to be. In order to fix this, we need to tell make that all .c files depend on certain .h files. We can do this by writing a simple rule and adding it to the makefile.
Makefile 3
CC=gcc
CFLAGS=-I.
DEPS = hellomake.h

%.o: %.c $(DEPS)
 $(CC) -c -o $@ $< $(CFLAGS)

hellomake: hellomake.o hellofunc.o 
 $(CC) -o hellomake hellomake.o hellofunc.o 
This addition first creates the macro DEPS, which is the set of .h files on which the .c files depend. Then we define a rule that applies to all files ending in the .o suffix. The rule says that the .o file depends upon the .c version of the file and the .h files included in the DEPS macro. The rule then says that to generate the .o file, make needs to compile the .c file using the compiler defined in the CC macro. The -c flag says to generate the object file, the -o $@ says to put the output of the compilation in the file named on the left side of the :, the $< is the first item in the dependencies list, and the CFLAGS macro is defined as above.
As a final simplification, let's use the special macros $@ and $^, which are the left and right sides of the :, respectively, to make the overall compilation rule more general. In the example below, all of the include files should be listed as part of the macro DEPS, and all of the object files should be listed as part of the macro OBJ.
Makefile 4
CC=gcc
CFLAGS=-I.
DEPS = hellomake.h
OBJ = hellomake.o hellofunc.o 

%.o: %.c $(DEPS)
 $(CC) -c -o $@ $< $(CFLAGS)

hellomake: $(OBJ)
 $(CC) -o $@ $^ $(CFLAGS)
So what if we want to start putting our .h files in an include directory, our source code in a src directory, and some local libraries in a lib directory? Also, can we somehow hide those annoying .o files that hang around all over the place? The answer, of course, is yes. The following makefile defines paths to the include and lib directories, and places the object files in an obj subdirectory within the src directory. It also has a macro defined for any libraries you want to include, such as the math library -lm. This makefile should be located in the src directory. Note that it also includes a rule for cleaning up your source and object directories if you type make clean. The .PHONY rule keeps make from doing something with a file named clean.
Makefile 5
IDIR =../include
CC=gcc
CFLAGS=-I$(IDIR)

ODIR=obj
LDIR =../lib

LIBS=-lm

_DEPS = hellomake.h
DEPS = $(patsubst %,$(IDIR)/%,$(_DEPS))

_OBJ = hellomake.o hellofunc.o 
OBJ = $(patsubst %,$(ODIR)/%,$(_OBJ))


$(ODIR)/%.o: %.c $(DEPS)
 $(CC) -c -o $@ $< $(CFLAGS)

hellomake: $(OBJ)
 $(CC) -o $@ $^ $(CFLAGS) $(LIBS)

.PHONY: clean

clean:
 rm -f $(ODIR)/*.o *~ core $(INCDIR)/*~ 
So now you have a perfectly good makefile that you can modify to manage small and medium-sized software projects. You can add multiple rules to a makefile; you can even create rules that call other rules. For more information on makefiles and the make function, check out the GNU Make Manual, which will tell you more than you ever wanted to know (really).

Wednesday, May 30, 2018

Linux diff command

Updated: 01/24/2018 by Computer Hope

About diff

diff analyzes two files and prints the lines that are different. Essentially, it outputs a set of instructions for how to change one file to make it identical to the second file.
It does not actually change the files; however, it can optionally generate a script (with the -e option) for the program ed (or ex which can be used to apply the changes.

How diff Works

Let's say we have two files, file1.txt and file2.txt.
If file1.txt contains the following four lines of text:
I need to buy apples.
I need to run the laundry.
I need to wash the dog.
I need to get the car detailed.
...and file2.txt contains these four lines:
I need to buy apples.
I need to do the laundry.
I need to wash the car.
I need to get the dog detailed.
...then we can use diff to automatically display for us which lines differ between the two files with this command:
diff file1.txt file2.txt
...and the output will be:
2,4c2,4
< I need to run the laundry.
< I need to wash the dog.
< I need to get the car detailed.
---
> I need to do the laundry.
> I need to wash the car.
> I need to get the dog detailed.
Let's take a look at what this output means. The important thing to remember is that when diff is describing these differences to you, it's doing so in a prescriptive context: it's telling you how to change the first file to make it match the second file.
The first line of the diff output will contain:
  • line numbers corresponding to the first file,
  • a letter (a for add, c for change, or d for delete), and
  • line numbers corresponding to the second file.
In our output above, "2,4c2,4" means: "Lines 2 through 4 in the first file need to be changed to match lines 2 through 4 in the second file." It then tells us what those lines are in each file:
  • Lines preceded by a < are lines from the first file;
  • lines preceded by > are lines from the second file.
The three dashes ("---") merely separate the lines of file 1 and file 2.
Let's look at another example. Let's say our two files look like this:
file1.txt:
I need to go to the store.
I need to buy some apples.
When I get home, I'll wash the dog.
file2.txt:
I need to go to the store.
I need to buy some apples.
Oh yeah, I also need to buy grated cheese.
When I get home, I'll wash the dog.
diff file1.txt file2.txt
Output:
2a3
> Oh yeah, I also need to buy grated cheese.
Here, the output is telling us "After line 2 in the first file, a line needs to be added: line 3 from the second file." It then shows us what that line is.
Now let's see what it looks like when diff tells us we need to delete a line.
file1:
I need to go to the store.
I need to buy some apples.
When I get home, I'll wash the dog.
I promise.
file2:
I need to go to the store.
I need to buy some apples.
When I get home, I'll wash the dog.
Our command:
diff file1.txt file2.txt
The output:
4d3
< I promise.
Here, the output is telling us "You need to delete line 4 in the first file so that both files sync up at line 3." It then shows us the contents of the line that needs to be deleted.

Viewing diff Output In Context

The examples above show the default output of diff. It's intended to be read by a computer, not a human, so for human purposes, sometimes it helps to see the context of the changes.
GNU diff, which is the version most linux users will be using, offers two different ways to do this: "context mode" and "unified mode".
To view differences in context mode, use the -c option. For instance, let's say file1.txt and file2.txt contain the following:
file1.txt:
apples
oranges
kiwis
carrots
file2.txt:
apples
kiwis
carrots
grapefruits
Let's look at the contextual output for the diff of these two files. Our command is:
diff -c file1.txt file2.txt
And our output looks like this:
*** file1.txt   2014-08-21 17:58:29.764656635 -0400
--- file2.txt   2014-08-21 17:58:50.768989841 -0400
***************
*** 1,4 ****
  apples
- oranges
  kiwis
  carrots
--- 1,4 ----
  apples
  kiwis
  carrots
+ grapefruits
The first two lines of this output show us information about our "from" file (file 1) and our "to" file (file 2). It lists the file name, modification date, and modification time of each of our files, one per line. The "from" file is indicated by "***", and the "to" file is indicated by "---".
The line "***************" is just a separator.
The next line has three asterisks ("***") followed by a line range from the first file (in this case lines 1 through 4, separated by a comma). Then four asterisks ("****").
Then it shows us the contents of those lines. If the line is unchanged, it's prefixed by two spaces. If the line is changed, however, it's prefixed by an indicative character and a space. The character meanings are as follows:
character meaning
! Indicates that this line is part of a group of one or more lines that needs to change. There is a corresponding group of lines prefixed with "!" in the other file's context as well.
+ Indicates a line in the second file that needs to be added to the first file.
- Indicates a line in the first file that needs to be deleted.
After the lines from the first file, there are three dashes ("---"), then a line range, then four dashes ("----"). This indicates the line range in the second file that will sync up with our changes in the first file.
If there is more than one section that needs to change, diff will show these sections one after the other. Lines from the first file will still be indicated with "***", and lines from the second file with "---".

Unified Mode

Unified mode (the -u option) is similar to context mode, but it doesn't display any redundant information. Here's an example, using the same input files as our last example:
file1.txt:
apples
oranges
kiwis
carrots
file2.txt:
apples
kiwis
carrots
grapefruits
Our command:
diff -u file1.txt file2.txt
The output:
--- file1.txt   2014-08-21 17:58:29.764656635 -0400
+++ file2.txt   2014-08-21 17:58:50.768989841 -0400
@@ -1,4 +1,4 @@
 apples
-oranges
 kiwis
 carrots
+grapefruits
The output is similar to above, but as you can see, the differences are "unified" into one set.

Finding Differences In Directory Contents

diff can also compare directories by providing directory names instead of file names. See the Examples section.

Using diff To Create An Editing Script

The -e option tells diff to output a script, which can be used by the editing programs ed or ex, that contains a sequence of commands. The commands are a combination of c (change), a (add), and d (delete) which, when executed by the editor, will modify the contents of file1 (the first file specified on the diff command line) so that it matches the contents of file2 (the second file specified).
Let's say we have two files with the following contents:
file1.txt:
Once upon a time, there was a girl named Persephone.
She had black hair.
She loved her mother more than anything.
She liked to sit outside in the sunshine with her cat, Daisy.
She dreamed of being a painter when she grew up.
file2.txt
Once upon a time, there was a girl named Persephone.
She had red hair.
She loved chocolate chip cookies more than anything.
She liked to sit outside in the sunshine with her cat, Daisy.
She would look up into the clouds and dream of being a world-famous baker.
We can run the following command to analyze the two files with diff and produce a script to create a file identical to file2.txt from the contents of file1.txt:
diff -e file1.txt file2.txt
...and the output will look like this:
5c
She would look up into the clouds and dream of being a world-famous baker.
.
2,3c
She had red hair.
She loved chocolate chip cookies more than anything.
.
Notice that the changes are listed in reverse order: the changes closer to the end of the file are listed first, and changes closer to the beginning of the file are listed last. This order is to preserve line numbering; if we made the changes at the beginning of the file first, that might change the line numbers later in the file. So the script starts at the end, and works backwards.
Here, the script is telling the editing program: "change line 5 to (the following line), and change lines 2 through 3 to (the following two lines)."
Next, we should save the script to a file. We can redirect the diff output to a file using the > operator, like this:
diff -e file1.txt file2.txt > my-ed-script.txt
This command will not display anything on the screen (unless there is an error); instead, the output is redirected to the file my-ed-script.txt. If my-ed-script.txt doesn't exist, it will be created; if it exists already, it will be overwritten.
If we now check the contents of my-ed-script.txt with the cat command...
cat my-ed-script.txt
...we will see the same script we saw displayed above.
There's still one thing missing, though: we need the script to tell ed to actually write the file. All that's missing from the script is the w command, which will write the changes. We can add this to our script by echoing the letter "w" and using the >> operator to add it to our file. (The >> operator is similar to the > operator. It redirects output to a file, but instead of overwriting the destination file, it appends to the end of the file.) The command looks like this:
echo "w" >> my-ed-script.txt
Now, we can check to see that our script has changed by running the cat command again:
cat my-ed-script.txt
5c
She would look up into the clouds and dream of being a world-famous baker.
.
2,3c
She had red hair.
She loved chocolate chip cookies more than anything.
.
w
Now our script, when issued to ed, will make the changes and write the changes to disk.
So how do we get ed to do this?
We can issue this script to ed with the following command, telling it to overwrite our original file. The dash ("-") tells ed to read from the standard input, and the < operator directs our script to that input. In essence, the system enters whatever is in our script as input to the editing program. The command looks like this:
ed - file1.txt < my-ed-script.txt
This command displays nothing, but if we look at the contents of our original file...
cat file1.txt
Once upon a time, there was a girl named Persephone.
She had red hair.
She loved chocolate chip cookies more than anything.
She liked to sit outside in the sunshine with her cat, Daisy.
She would look up into the clouds and dream of being a world-famous baker.
...we can see that file1.txt now matches file2.txt exactly.
Warning! In this example, ed overwrote the contents of our original file, file1.txt. After running the script, the original text of file1.txt disappears, so make sure you understand what you're doing before running these commands!

Commonly-Used diff Options

Here are some useful diff options to take note of:
-b Ignore any changes which only change the amount of whitespace (such as spaces or tabs).
-w Ignore whitespace entirely.
-B Ignore blank lines when calculating differences.
-y Display output in two columns.
These are only some of the most commonly-used diff options. What follows is a complete list of diff options and their function.

diff syntax

diff [OPTION]... FILES

Options

--normal Output a "normal" diff, which is the default.
-q, --brief Produce output only when files differ. If there are no differences, output nothing.
-s, --report-identical-files Report when two files are the same.
-c, -C NUM, --context[=NUM] Provide NUM (default 3) lines of context.
-u, -U NUM, --unified[=NUM] Provide NUM (default 3) lines of unified context.
-e, --ed Output an ed script.
-n, --rcs Output an RCS-format diff.
-y, --side by side Format output in two columns.
-W, --width=NUM Output at most NUM (default 130) print columns.
--left-column Output only the left column of common lines.
--suppress-common-lines Do not output lines common between the two files.
-p, --show-c-function For files that contain C code, also show each C function change.
-F, --show-function-line=RE Show the most recent line matching regular expression RE.
--label LABEL When displaying output, use the label LABEL instead of the file name. This option can be issued more than once for multiple labels.
-t, --expand-tabs Expand tabs to spaces in output.
-T, --initial-tab Make tabs line up by prepending a tab if necessary.
--tabsize=NUM Define a tab stop as NUM (default 8) columns.
--suppress-blank-empty Suppress spaces or tabs before empty output lines.
-l, --paginate Pass output through pr to paginate.
-r, --recursive Recursively compare any subdirectories found.
-N, --new-file If a specified file does not exist, perform the diff as if it is an empty file.
--unidirectional-new-file Same as -n, but only applies to the first file.
--ignore-file-name-case Ignore case when comparing file names.
--no-ignore-file-name-case Consider case when comparing file names.
-x, --exclude=PAT Exclude files that match file name pattern PAT.
-X, --exclude-from=FILE Exclude files that match any file name pattern in file FILE.
-S, --starting-file=FILE Start with file FILE when comparing directories.
--from-file=FILE1 Compare FILE1 to all operands; FILE1 can be a directory.
--to-file=FILE2 Compare all operands to FILE2; FILE2 can be a directory.
-i, --ignore-case Ignore case differences in file contents.
-E, --ignore-tab-expansion Ignore changes due to tab expansion.
-b, --ignore-space-change Ignore changes in the amount of white space.
-w, --ignore-all-space Ignore all white space.
-B, --ignore-blank-lines Ignore changes whose lines are all blank.
-I, --ignore-matching-lines=RE Ignore changes whose lines all match regular expression RE.
-a, --text Treat all files as text.
--strip-trailing-cr Strip trailing carriage return on input.
-D, --ifdef=NAME Output merged file with "#ifdef NAME" diffs.
--GTYPE-group-format=GFMT Format GTYPE input groups with GFMT.
--line-format=LFMT Format all input lines with LFMT.
--LTYPE-line-format=LFMT Format LTYPE input lines with LFMT.

These format options provide fine-grained control over the output of diff, generalizing -D/--ifdef.

LTYPE is old, new, or unchanged.

GTYPE can be any of the LTYPE values, or the value changed.

GFMT (but not LFMT) may contain:

%< lines from FILE1
%> lines from FILE2
%= lines common to FILE1 and FILE2.
%[-][WIDTH][.[PREC]]{doxX}LETTER printf-style spec for LETTER
LETTERs are as follows for new group, lower case for old group:
F First line number.
L Last line number,
N Number of lines = L - F + 1.
E F - 1
M L + 1
%(A=B?T:E) If A equals B then T else E.
LFMT (only) may contain:
%L Contents of line.
%l Contents of line, excluding any trailing newline.
%[-][WIDTH][.[PREC]]{doxX}n printf-style spec for input line number.
Both GFMT and LFMT may contain:
%% A literal %.
%c'C' The single character C.
%c'\OOO' The character with octal code OOO.
C The character C (other characters represent themselves).
-d, --minimal Try hard to find a smaller set of changes.
--horizon-lines=NUM Keep NUM lines of the common prefix and suffix.
--speed-large-files Assume large files and many scattered small changes.
--help Display a help message and exit.
-v, --version Output version information and exit.
FILES takes the form "FILE1 FILE2" or "DIR1 DIR2" or "DIR FILE..." or "FILE... DIR".
If the --from-file or --to-file options are given, there are no restrictions on FILE(s). If a FILE is a dash ("-"), diff reads from standard input.
Exit status is either 0 if inputs are the same, 1 if different, or 2 if diff encounters any trouble.

diff examples

Here's an example of using diff to examine the differences between two files side by side using the -y option, given the following input files:
file1.txt:
apples
oranges
kiwis
carrots
file2.txt:
apples
kiwis
carrots
grapefruits
diff -y file1.txt file2.txt
Output:
apples            apples
oranges         <
kiwis             kiwis
carrots           carrots
                > grapefruits
And as promised, here is an example of using diff to compare two directories:
diff dir1 dir2
Output:
Only in dir1: tab2.gif
Only in dir1: tab3.gif
Only in dir1: tab4.gif
Only in dir1: tape.htm
Only in dir1: tbernoul.htm
Only in dir1: tconner.htm
Only in dir1: tempbus.psd

Tuesday, January 16, 2018

chkconfig

The chkconfig command can also be used to activate and deactivate services. The chkconfig --listcommand displays a list of system services and whether they are started (on) or stopped (off) in runlevels 0-6. At the end of the list is a section for the services managed by xinetd.
If the chkconfig --list command is used to query a service managed by xinetd, it displays whether the xinetd service is enabled (on) or disabled (off). For example, the command chkconfig --list rsync returns the following output:
rsync          on
As shown, rsync is enabled as an xinetd service. If xinetd is running, rsync is enabled.
If you use chkconfig --list to query a service in /etc/rc.d, that service's settings for each runlevel are displayed. For example, the command chkconfig --list httpd returns the following output:
httpd         0:off   1:off   2:on    3:on    4:on    5:on    6:off
chkconfig can also be used to configure a service to be started (or not) in a specific runlevel. For example, to turn nscd off in runlevels 3, 4, and 5, use the following command:
chkconfig --level 345 nscd off

Wednesday, January 10, 2018

Tuesday, January 2, 2018

How to get the current date and time in the terminal

The command is date
To customise the output there are a myriad of options available, see date --help for a list.
For example, date '+%A %W %Y %X' gives Tuesday 34 2013 08:04:22 which is the name of the day of the week, the week number, the year and the time.

Monday, January 1, 2018

Octave for GNU/Linux

The recommended way for installing Octave and Octave-Forge packages on GNU/Linux systems is via each distribution package installation system.
More detailed instructions follow.

Contents

Debian and Debian-based (such as Ubuntu)

Main article: Octave for Debian systems
Simply install Octave from your distribution repository:
apt-get install octave
For old versions of Ubuntu that only supply old versions of Octave, consider using Octave's PPA. For more details, see the Debian specific instructions page.
There are also Debian packages for each of the Octave-Forge packages, usually named octave<pkgname>, e.g, octave-image and octave-statistics for the image processing and statistics package respectively. A complete list of them can be found with the command:
aptitude search ?description\(octave-forge\)

Fedora

Main article: Octave for Red Hat Linux systems
The packages can be installed using the dnf command, they are:
  • octave
  • octave-devel
octave-devel contains the octave headers and mkoctfile script and is really only needed by users who are developing code that is to be dynamically linked to octave. octave can be installed with the command:
   # dnf install octave

Gentoo

Octave is available through Gentoo's package management system, Portage:
   # emerge --sync
Add USE flag 'curl' into your /etc/portage/package.use file to enable remote Octave-Forge packages fetching
sci-mathematics/octave curl
and emerge Octave
   # emerge octave
Since Octave ver. > 3.4.0 is able to fetch Octave-Forge packages from remote repository, packages octave-forge or g-octave are no more needed.
Before installing any Octave-Forge package, in Octave command prompt you must type
pkg -forge list
and then install your favourite packages. Typically, you have to start with
pkg install -forge general

Red Hat Enterprise/CentOS

Main article: Octave for Red Hat Linux systems
Octave is available for Red Hat Enterprise Linux distributions through the EPEL repository. This section applies to CentOS, Scientific Linux, and other Red Hat Enterprise rebuild distributions as well.
Method 1 - the quick way:
   yum install epel-release
   yum install octave
Method 2 - if the above does not work:
First, follow these instructions to set up your system to install packages from EPEL. For example,
   # wget http://url/to/latest/epel-release-6-7.noarch.rpm
   # yum localinstall epel-release-6-7.noarch.rpm
Once the EPEL repository has been enabled, you can follow the rest of the instructions for Fedora to install Octave using yum.
Note that EPEL intentionally does not follow new releases as closely as other distributions. Consequently, the version of Octave provided by EPEL may be several months or years out of date. There are plans for the Octave maintainers to provide support and binary RPMs for enterprise GNU/Linux distributions; contact the maintainers mailing list for more information.

SUSE Linux and openSUSE

Main article: Octave for openSUSE
Binary packages for Octave are provided by all versions of openSUSE. It can be installed by command:
zypper in octave
Latest stable version of Octave and Octave-Forge are available on Science repository. For details see openSUSE specific wiki page.

Arch Linux

Main article: Octave for Arch Linux
Updated Octave's version is in the extra repository. It can be installed by typing:
   # pacman -S octave

Saturday, December 30, 2017

Install Flash Player in five easy steps

1. Check if Flash Player is installed on your computer

2. Download the latest version of Flash Player

If you don't have the latest version, download it here: Adobe Flash Player download

3. Install Flash Player

After you download Flash Player, follow the installation instructions that appear on the download page.

4. Enable Flash Player in your browser

For Internet Explorer, see Enable Flash Player for Internet Explorer.
For Internet Explorer on Windows 10, see Enable Flash Player for IE on Windows 10.
     For Edge on Windows 10, see Enable Flash Player for Edge on Windows 10.
For Firefox on any OS, see Enable Flash Player for Firefox.
For Safari on Mac OS, see Enable Flash Player for Safari.
For Google Chrome, see Enable Flash Player for Chrome.

5. Verify whether Flash Player is installed

If you see clouds moving in the animation below, you have successfully installed Flash Player. Congratulations! 
If you don't see the animation after completing all the steps, refresh this page using the icon below.

Sunday, December 24, 2017

Adobe Flash Player

vào trang https://get.adobe.com/flashplayer/ để tải file rpm
chạy lệnh:
$ sudo yum install -y flash-player-npapi-28.0.0.126-release.x86_64.rpm
----------
Bộ 4 trình duyệt hiện đại (IE của Microsoft, Safari của Apple, Chrome của Google, Firefox của cộng đồng nguồn mở) đều không cần sử dụng flash player mà vẫn có thể xem video và audio
--------
Opera browser 


  1. Launch Opera.


  2. In the address field, type opera://settings.
    Open the Opera settings

  3. On the settings page, type Flash in the search field.
    enable-flash-opera-step-3

  4. Click Manage Exceptions button.
    enable-flash-opera-step-4

  5. On the Flash exceptions screen, enter the website domain and then select Allow. When finished adding
    sites, click Done.
    enable-flash-opera-step-5

  6. Refresh the browser tab, or restart the browser.
------------ 
Chromium


hiện giờ chromium đã không còn support flash player nữa(bây giờ cũng không còn plugin nào cho chromium nữa, cũng ko vào đuợc about://plugin hay chrome://plugin nữa)

tuy nhiên có thể tham khảo ở bài viết cài chromium trong blog này

CentOS 7: Install Opera for Web Browser

Table of Contents

1 Install opera

Install opera package.
$ URL=http://download3.operacdn.com/pub/opera/desktop/47.0.2631.39/linux
$ sudo yum install -y ${URL}/opera-stable_47.0.2631.39_amd64.rpm
If you need Flash, run the following command.
$ URL=http://linuxdownload.adobe.com/adobe-release/adobe-release-x86_64-1.0-1.noarch.rpm
$ sudo yum install -y ${URL}
$ sudo yum install -y flash-player-ppapi

2 Run opera

Run opera.
$ opera
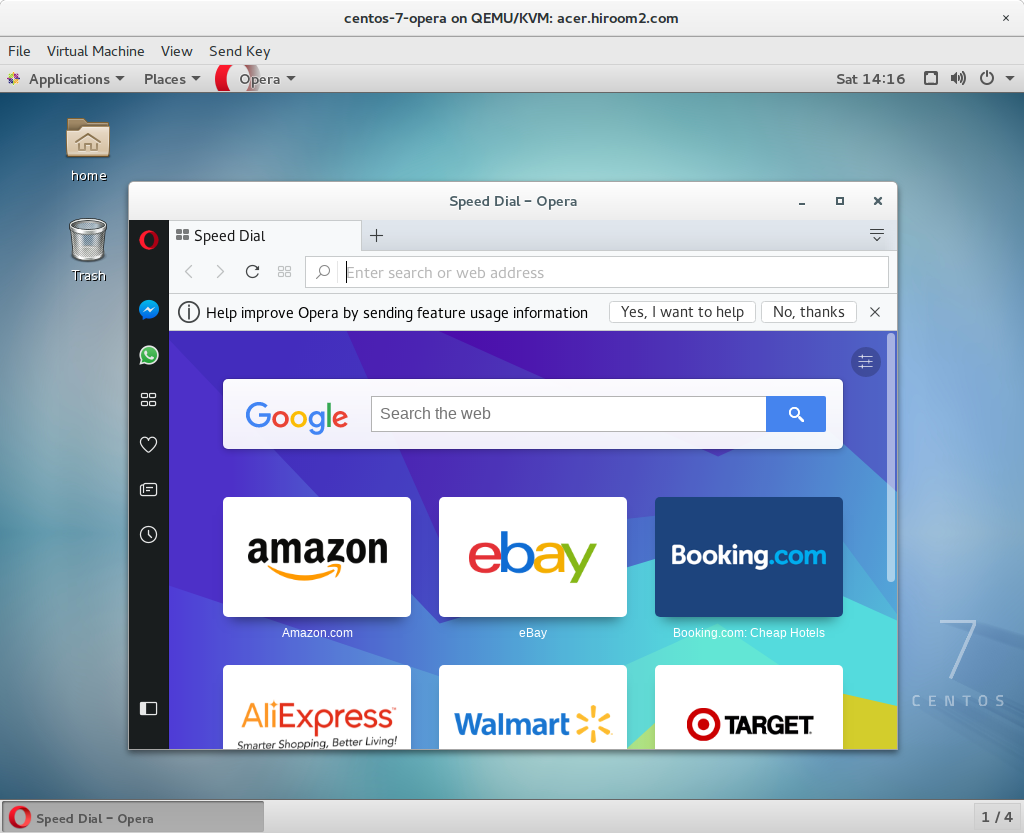
0001_Opera.png

CentOS 7: Install Chromium for Web Browser

1 Install chromium

Install chromium package.
$ sudo yum install -y epel-release
$ sudo yum install -y chromium
If you need Flash, run the following command.
$ URL=http://linuxdownload.adobe.com/adobe-release/adobe-release-x86_64-1.0-1.noarch.rpm
$ sudo yum install -y ${URL}
$ sudo yum install -y flash-player-ppapi
$ for f in /usr/lib64/flash-plugin/*; do
  sudo ln -s "${f}" /usr/lib64/chromium-browser/PepperFlash/
done

2 Run chromium

Run chromium.
$ chromium
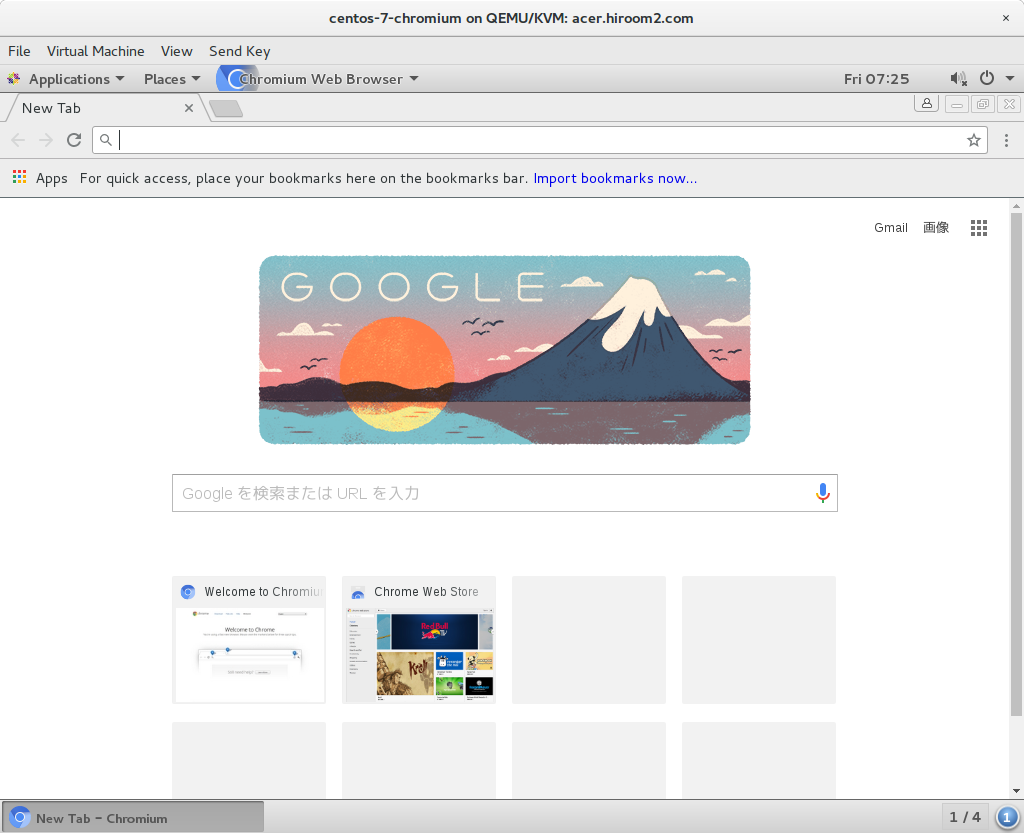
0001_Chromium.png

Change RunLevel

[1]

RunLevel is set with linking to /etc/systemd/system/default.target. For example, the default setting without GUI is like follows.
# show current setting

[root@dlp ~]#
systemctl get-default

multi-user.target
[root@dlp ~]#
ll /etc/systemd/system/default.target

lrwxrwxrwx. 1 root root 37 Jul 9 06:04 /etc/systemd/system/default.target -> /lib/systemd/system/multi-user.target
[2] For example, if you'd like to change the RunLevel to Graphical-login, set like follows.
[root@dlp ~]#
systemctl set-default graphical.target

rm '/etc/systemd/system/default.target'
ln -s '/usr/lib/systemd/system/graphical.target' '/etc/systemd/system/default.target'
# make sute the setting

[root@dlp ~]#
systemctl get-default

graphical.target
[root@dlp ~]#
ll /etc/systemd/system/default.target

lrwxrwxrwx 1 root root 36 Jul 9 21:55 /etc/systemd/system/default.target -> /lib/systemd/system/graphical.target

How to Mount and Unmount an ISO Image in RHEL/CentOS/Fedora and Ubuntu

An ISO image or .iso (International Organization for Standardization) file is an archive file that contains a disk image called ISO 9660 file system format. Every ISO file have .ISO extension has defined format name taken from the ISO 9660 file system and specially used with CD/DVD Rom’s. In simple words an iso file is a disk image.
How to mount iso image in linux
mount and unmount iso images in linux
I have seen most of the Linux operating system that we download from the internet are .ISO format. Typically an ISO image contains installation of software’s such as, operating system installation, games installation or any other applications. Sometimes it happens that we need to access files and view content from these ISO images, but without wasting disk space and time in burning them on to CD/DVD.
This article describes how to mount and unmount an ISO image on a Linux Operating system to access and list the content of files.

How to Mount an ISO Image

To mounting an ISO image on Linux (RedHat, CentOS, Fedora or Ubuntu), you must be logged in as “root” user or switch to “sudo” and run the following commands from a terminal to create a mount point.
# mkdir /mnt/iso
OR
$ sudo mkdir /mnt/iso
Once you created mount point, use the “mount” command to mount an iso file called “Fedora-18-i386-DVD.iso“.
# mount -t iso9660 -o loop /home/tecmint/Fedora-18-i386-DVD.iso /mnt/iso/
OR
$ sudo mount -t iso9660 -o loop /home/tecmint/Fedora-18-i386-DVD.iso /mnt/iso/
After the ISO image mounted successfully, go the mounted directory at /mnt/iso and list the content of an ISO image. It will only mount in read-only mode, so none of the files can be modified.
# cd /mnt/iso
# ls -l
You will see the list of files of an ISO image, that we have mounted in the above command. For example, the directory listing of an Fedora-18-i386-DVD.iso image would look like this.
total 16
drwxrwsr-x  3 root 101737 2048 Jan 10 01:00 images
drwxrwsr-x  2 root 101737 2048 Jan 10 01:00 isolinux
drwxrwsr-x  2 root 101737 2048 Jan 10 01:00 LiveOS
drwxrwsr-x 28 root 101737 4096 Jan 10 00:38 Packages
drwxrwsr-x  2 root 101737 4096 Jan 10 00:43 repodata
-r--r--r--  1 root root   1538 Jan 10 01:00 TRANS.TBL

How to Unmount an ISO Image

Simply run the following command from the terminal either “root” or “sudo” to unmount an mounted ISO image.
# umount /mnt/iso
OR
$ sudo umount /mnt/iso
Where Options
  1. -t : This argument is used to indicate the given filesystem type.
  2. ISO 9660 : It describes standard and default filesystem structure to be used on CD/DVD ROMs.
  3. -o : Options are necessary with a -o argument followed by a separated comma string of options.
  4. loop: The loop device is a pseudo-device that often used for mounting CD/DVD ISO image and makes those files accessible as a block device.

Saturday, December 23, 2017

FDISK command: How To Fix A Broken USB Drive Using Linux

Introduction

Sometimes when people create a Linux USB drive they find that the drive seems to become unusable.
This guide will show you how to format the USB drive again using Linux so that you can copy files to it and use it as you ordinarily would.
After you have followed this guide your USB drive will be usable on any system capable of reading a FAT32 partition.
Anybody familiar with Windows will notice that the fdisk tool used within Linux is much like the diskpart tool.

Delete The Partitions Using FDisk

Open a terminal window and type the following command:
sudo fdisk -l
This will tell you which drives are available and it also gives you details of the partitions on the drives.
In Windows a drive is distinguished by its drive letter or in the case of the diskpart tool each drive has a number.
In Linux a drive is a device and a device is handled much like any other file. Therefore the drives are named /dev/sda, /dev/sdb, /dev/sdc and so on.
Look for the drive which has the same capacity as your USB drive. For example on an 8 gigabyte drive it will be reported as 7.5 gigabytes.
When you have the correct drive type the following command:
sudo fdisk /dev/sdX
Replace the X with the correct drive letter.
This will open a new prompt called "Command". The "m" key is very helpful with this tool but basically you need to know 2 of the commands.
The first is delete.
Enter "d" and press the return key.
If your USB drive has more than one partition it will ask you to enter a number for the partition you wish to delete. If your drive only has one partition then it will be marked for deletion.
If you have multiple partitions keep entering "d" and then enter partition 1 until there are no partitions left to be marked for deletion.
The next step is to write the changes to the drive.
Enter "w" and press return.
You now have a USB drive with no partitions. At this stage it is completely unusable.

Create A New Partition

Within the terminal window open fdisk again as you did before by specifying the name of the USB device file:
sudo fdisk /dev/sdX
As before replace the X with the correct drive letter.
Enter "N" to create a new partition.
You will be asked to choose between creating a primary or extended partition. Choose "p".
The next step is to choose a partition number. You only need to create 1 partition so enter 1 and press return.
Finally you need to choose the start and end sector numbers. To use the whole drive press return twice to keep the default options.
Enter "w" and press return.

Refresh The Partition Table

A message may appear stating that the kernel is still using the old partition table.
Simply enter the following into the terminal window:
sudo partprobe
The partprobe tool simply informs the kernel or partition table changes. This saves you having to reboot your computer.
There are a couple of switches you can use with it.
sudo partprobe -d
The minus d switch lets you try it without it updating the kernel. The d stands for dry run.
This is not overly useful.
sudo partprobe -s
This provides a summary of the partition table with output similar to the following:
/dev/sda: gpt partitions 1 2 3 4
/dev/sdb: msdos partitions 1 

Create A FAT Filesystem

The final step is to create the FAT filesystem.
Enter the following command into the terminal window:
sudo mkfs.vfat -F 32 /dev/sdX1
Replace the X with the letter for your USB drive.

Mount The Drive

To mount the drive run the following commands:
sudo mkdir /mnt/sdX1
sudo mount /dev/sdX1 /mnt/sdX1
As before replace the X with the correct drive letter.

Summary

You should now be able to use the USB drive on any computer and copy files to and from the drive as normal.

Sunday, December 17, 2017

Screen capture, screenshot, snapshot in centos


with gnome:

gnome-screenshot

or


gnome-snapshot


How to use?

press PrintScreen button to shot whole screen

press shift + PrintScreen to shot a selected area

wineHQ on Centos

Installation

Dialog-warning.svg For those on release 7, be sure to read the next sub-section. As of Mar. 2016, installing wine on CentOS 7 is a bit more involved; read below for the reasons.
For any work with packages, you'll definitely want to be familiar with your package manager. Up through release 7, the standard package manager has been yum, but with Fedora adopting the leaner, meaner dnf package manager, there's a good chance this will be increasingly preferred, possibly even the default in release 8.
Since some releases of enterprise linux might not even include a wine package by default, your best bet for finding a fresh package is probably Fedora's EPEL repo ("Extra Packages for Enterprise Linux"). This repo contains updates and extra packages backported from Fedora to more stable Red Hat-based distros. If you want to enable the EPEL repo, all you need to do is install the epel-release meta-package:
yum install epel-release    (if using yum)
dnf install epel-release    (if using dnf)

Then if you want the wine package from the EPEL, it's as simple as another install command:
yum install wine    (yum users)
dnf install wine    (dnf users)
If your distro does include a wine package by default, you should be able to use the above install command without even enabling the EPEL.

Notes on EPEL 7

At the time of this writing, EPEL 7 still has no 32-bit packages (including wine and its dependencies). There is a 64-bit version of wine, but without the 32-bit libraries needed for WoW64 capabilities, it cannot support any 32-bit Windows apps (the vast majority) and even many 64-bit ones (that still include 32-bit components).
This is primarily because with release 7, Red Hat didn't have enough customer demand to justify an i386 build. While Red Hat itself still comes with lean multilib and 32-bit support for legacy needs, this is part of Red Hat's release process, not the packages themselves. Therefore CentOS 7 had to develop its own workflow for building an i386 release, a process that was completed in Oct 2015.
With its i386 release, CentOS has cleared a major hurdle on the way to an EPEL with 32-bit libraries, and now the ball is in the Fedora project's court (as the maintainers of the EPEL). Once a i386 version of the EPEL becomes available, you should be able to follow the same instructions above to install a fully functional wine package for CentOS 7 and its siblings.
Thankfully, this also means that EPEL 8 shouldn't suffer from this same problem. In the meantime though, you can keep reading for some hints on getting a recent version of wine from the source code.

Special Considerations for Red Hat

Those with a Red Hat subscription should have access to enhanced help and support, but we wanted to provide some very quick notes on enabling the EPEL for your system. Before installing the epel-release package, you'll first need to activate some additional repositories.
On release 6 and older, which used the Red Hat Network Classic system for package subscriptions, you need to activate the optional repo with rhn-channel
rhn-channel -a -c rhel-6-server-optional-rpms -u <your-RHN-username> -p <your-RHN-password>

Starting with release 7 and the Subscription Manager system, you'll need to activate both the optional and extras repos with subscription-manager
subscription-manager repos --enable=rhel-7-server-optional-rpms
subscription-manager repos --enable=rhel-7-server-extras-rpms
As for source RPMs signed by Red Hat, there doesn't seem to be much public-facing documentation. With a subscription, you should be able to login and browse the repos; this post on LWN also has some background.

Building from Source

Now if you want a bleeding-edge wine release, or you just want to work with the source code, Building Wine from source is probably your best bet. This has a few idiosyncrasies no matter which version of CentOS / Scientific Linux you may be on, which we'll go over.
Dialog-warning.svg One issue with extremely stable distros like CentOS is that your libraries may be older versions than those required by the newest wine release or the tip of the WineHQ git tree. In that case, you may need to debug the build process a little and possibly build newer versions of a library or two from source.
Dialog-warning.svg If you do build wine from source, it's strongly suggested that you don't install it into your system but rather run it from within the build-directory.

Releases Other Than 7

On releases 5 and 6 (and hopefully 8+) of CentOS, multilib capabilities should make installing the necessary build dependencies a breeze (no chroot needed)... you just have to find them first. One approach is the trial-and-error method of simply re-running configure from the wine source code, installing whatever libraries it complains are missing.
Another method is to use a build-dependency tool for your package manager. If that's yum, you'll need to install the yum-utils package, while dnf on the other hand needs dnf-plugins-core. One minor annoyance is that if you haven't used source repos before on CentOS, you'll also need to enable those in your package manager. Otherwise your builddep tool won't be able to automatically resolve dependencies.
  • For packages from the EPEL, this is a breeze:
yum-config-manager --enable epel-source    (for yum users)
dnf config-manager --set-enabled epel-source    (for dnf users)
  • For packages actually in CentOS proper... it's a bit more involved. You'll essentially need to:
    • Get a .repo file for your distro's source-RPMs
    • Copy it into your /etc/yum.repos.d/ directory
    • Enable the various repos with a config-manager command like above

Tango-style info icon.svg For now, CentOS Bug #1646 is probably the best source for what your .repo file should look like and other details. However, we may provide an updated .repo file for further refinement in the future.
Once you do have the source repos enabled, the actual installation should take only a single command:
yum-builddep wine    (for yum users)
dnf builddep wine    (for dnf users)

Tango-style info icon.svg Anyone that has recently built the latest version of wine from source on CentOS / Scientific Linux / Red Hat is welcome to list all the dependencies here. Then other users can try copying the list and passing it directly to yum or dnf to install any build deps. However, note that these lists are often out-of-date or incomplete, in which case you'll have to fall back on one of the previous methods.

For Release 7

For the same reasons that a functional wine package in EPEL 7 is still a no-go, it used to be a labyrinth trying to build wine on CentOS 7. The same lack of 32-bit libraries mentioned above is still a potential obstacle. Fortunately, most of the necessary libraries are part of the CentOS base repository, so with the 32-bit release of CentOS 7, only a few extra libraries need to be built manually.
According to user "gcomes" on the CentOS forums, as of Feb. 2016, the only two libraries not provided in the i386 version of CentOS 7 are openal-soft and nss-mdns. You should only need to install the i386 release of CentOS (possibly to a chroot or container) and wine's dependencies, compile and install these additional two libraries, then build wine from source. You can package the build results as a vanilla 32-bit RPM for your amd64 system.
If you want a WoW64 version, that should be possible too. Just place a completed build directory for 64-bit wine somewhere your 32-bit image can still access, then follow the Shared WoW64 instructions to complete your build.

Tango-style info icon.svg The multilib capabilities of Red Hat-based distros should theoretically allow installing packages from i386 CentOS into an existing amd64 installation, then building everything without a chroot. However, we have not tested this yet.